Real Food Bryn

Epipen-Wielding Real Food Eating


Leave a comment

Recipe: Beef Liver Pâté

If you have seen some of my recent What I Ate Wednesday posts, you may  notice an over abundance of beef liver pâté. I made this on a whim (and because I had 3 lbs of beef liver in the freezer) and I am completely in love. I followed this recipe as a general outline, but modified to be the one below. My favorite way to eat it so far is just with plantain crackers. However, I just got a new dehydrator (so excited!) so there may be some new cracker additions soon 🙂

Ingredients

  • 1 lb of grass-fed beef liver, cut into thin slices or chunks. Mine came from US Wellness Meats
  • 1 medium onion
  • 2-3 Tbsp minced garlic (I like garlic A LOT)
  • 1 Tbsp apple cider vinegar (balsamic or red wine vinegar would also taste great with this)
  • 1-1.5 Tbsp rosemary
  • 1 Tbsp thyme
  • salt and pepper to taste
  • ~1 cup total of olive oil and coconut oil or bacon fat

Directions

  1. Fry the liver and onions in ~2 Tbsp of the coconut oil or bacon fat (or lard or duck fat…but not the olive oil).
  2. When the onions are caramelized and the liver is cooked through, add the garlic, cider vinegar, rosemary, and thyme.
  3. Cook for a few more minutes until the liquid from the vinegar is reduced.
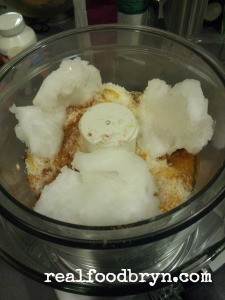
  4. Remove from heat and let it cool for 5 minutes, then transfer to a food processor with 1/4-1/2 cup of olive oil or coconut oil.
  5. Process until smooth, adding the remaining olive or coconut oil as you go to give a moist, creamy final product.
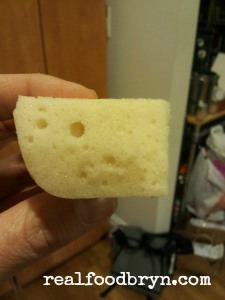
  6. Portion into containers for freezing. I split mine in half (I started with a 1-lb liver), so one liver makes two-weeks worth of breakfast for me.

2013-05-23-19-37-252013-05-23-19-56-30

2013-05-23-19-57-352013-05-23-20-00-402013-05-23-20-05-47

When I first started moving toward real food, I never thought I would end up making my own pâté. So far, it is my favorite way to eat liver.

What is your favorite way to eat liver?


1 Comment

Recipe Post: Butternut Squash Lasagna

I have been holding on to the post for a VERY long time. Typing up the recipe has been on my to-do list for at least two months :-/ oops. This was a staple for us during the colder weather. It is a rich and filling gluten- and grain-free lasagna. I am thinking about trying to make it in my crockpot to see if it can become a very hands-off recipe (minus the preparation, of course).

**Want a meatless version? Omit the ground meat and substitute another 20-30 white or baby bella mushrooms (or others, shitake mushrooms are delish)

Ingredients

  • 1 lb ground meat of your choice. We used turkey, but this would be delicious with beef, bison, or lamb.
  • 1 Tbsp coconut oil
  • garlic: 2 tsp diced
  • 10-12 baby bella mushrooms, diced or sliced
  • 1 medium onion diced, yellow or red
  • 1 large carrot, shredded or diced
  • 2 tomatoes diced (or a can of stewed or diced tomatoes)
  • 1 large butternut squash (or the necks from 2 squashes), sliced. You can use a mandoline to achieve more noodle-like slices. We stick with the half-circle pieces.
  • at least one large jar of tomato/pasta sauce. We like saucy lasagna, so we used between 1.25 and 1.5 jars
  • nutritional yeast-as much as needed for layering
  • Seasoning: red pepper, basil, oregano, paprika, parsley, thyme
  • optional: drizzle of honey

2013-02-10-16-25-52

Directions
Meat Sauce-

  • Heat the coconut oil in a large skillet, and add the ground meat.
  • When the meat is approximately half cooked, add the garlic, diced onion, and diced or shredded carrots.
  • Once the onions and carrots begin to soften, add the diced mushrooms.
  • When the meat is fully cooked, add the diced tomatoes and 3/4 of one jar of sauce to the pan. Season to your liking with red pepper, basil, oregano, paprika, parsley, and time. Taste as you go (because the meat is now cooked)!
  • If you like, you can add a drizzle of honey to cut the acidity of the sauce.

2013-02-10-17-00-332013-02-10-17-24-29

Assembly-

  • In a 9×13 pan, start with a layer of sauce.
  • Place the sliced butternut squash on top of the sauce in any formation that will cover the whole pan. I cut up some of the half-circles to lay down in the empty holes that appeared.
  • Next, layer the meat sauce.
  • Sprinkle nutritional yeast over the meat.
  • Layer squash, meat sauce, and nutritional yeast until the pan is nearly full. I usually get a total of two meat sauce layers.
  • Top with squash, plain tomato sauce, and nutritional yeast.
  • Cover with foil.

2013-02-10-17-09-412013-02-10-17-28-21

Cooking-

  • Bake at 350 degrees for 45-60 minutes. The lasagna is ready when you can easily pierce the squash with a fork.
  • Let cool for a few minutes before serving if you would like the pieces to hold together. Otherwise, be careful, but dig in 🙂

2013-02-10-18-51-04-1


7 Comments

Recipe: Maca Coconut Balls

Maca root powder is a delicious addition to your diet that is full of antioxidants. Maca is an adaptogenic herb that is known to balance hormones and promote fertility. It is sometimes referred to as “nature’s viagra” (though this one is also for the ladies). I like to mix up a batch of these no-bake “cookies” and eat a couple with my breakfast.

Maca Coconut Balls

Ingredients

  • 2 cups shredded coconut
  • ~6 Tablespoons coconut oil (I don’t really measure this. Start with a couple big scoops and add more as needed for your desired consistency.
  • 2 tsps vanilla
  • 4 tsps maca powder
  • ~1 Tablespoon honey
  • 2 tsps cinnamon (or more, to taste)

2013-04-07-19-11-20

  1. Combine all ingredients in a food processor. These amounts work perfectly in the small bowl on my food processor, but I do have a fairly large model.
  2. Process until everything makes a nice paste.
  3. Scoop out and form into small balls. Now that the weather is a little warmer, I will sometimes put the whole food processor bowl into the fridge for 10 minutes before this step.
  4. Once formed, store the balls in the refrigerator.

2013-04-07-19-13-152013-04-07-19-32-472013-04-07-19-38-07

Some other delicious maca recipes:

Maca Fertility Smoothie

How to Use Maca Powder


2 Comments

Recipe: Cauliflower Potato Soup

This soup has become one of our winter staples. We make a batch on the weekend and then eat it throughout the week. We would probably get more mileage out of it if we froze some portions, but then what would I eat for breakfast??? lol

I like to serve it topped with hemp seeds or dairy-free shredded cheese, but there are many other options: bacon crumbles, sour cream, green onions to name a few.

Ingredients

  • 1 yellow onion, chopped
  • 2 small leeks (or 1 large), chopped
  • 1 head of cauliflower, cut into large chunks
  • mix of potatoes–I ended up using 1 yukon gold and 5 medium red, cut into large chunks
  • chicken broth–it took 3 cans and 10 muffin-sized frozen pucks of homemade broth to fill my crock pot. Could sub veggie broth to make it vegan
  • seasoning: celery salt, garlic powder, pepper, and parsley

Instructions

This is pretty literally a “chop it up and put it in the crock pot” recipe.  I layered my ingredients in this order:

  • 6 frozen pucks of chicken broth
  • chopped onion
  • chopped leeks
  • chunked cauliflower
  • 4 frozen pucks of chicken broth
  • chunked potatoes
  • seasonings–Add a little now and more after it cooks. I used A LOT of parsley and garlic.
  • cans of chicken broth (um, opened and poured, obvs)

I cooked mine for 10 hours on low, mashed it up with a potato masher, and then let it cook for another hour.

Photographic Evidence:

2013-02-15-23-47-542013-02-15-23-56-172013-02-16-00-03-23

2013-02-16-00-06-142013-02-16-10-51-49


Leave a comment

Health Benefits of Gelatin and a Recipe: Maple Vanilla Marshmallows

I never thought I would be interested in making homemade marshmallows, but after seeing a few recipes online I decided to dive in. Once I started my internet search, I found a wealth of resources about the health benefits of gelatin. Some of the top benefits I discovered (check the bottom of this post for references):

  • Decent source of protein
  • Beneficial for joint health and has been shown to help re-grow joint cartilage in mice.
  • Potential to improve cellulite (woohoo!) AND tighten skin (woot!)
  • Supports digestion

These are more moist than normal marshmallows, but they are sweet and squishy and fun to snack on. Inspired by this recipe at Purely Twins, I give you:

Maple Vanilla Marshmallows

Ingredients

  • 2 cups water
  • 6 tbsp gelatin
  • 5 tbsp maple syrup
  • 2 tsp vanilla

Directions

  1. Add the gelatin to 1/2 cup water and set aside.
  2. Heat the remaining 1 1/2 cups of water in a medium sauce pan.
  3. Add the maple syrup and vanilla and heat to just to below boiling.
  4. Add the gelatin/water slurry to the pan and stir until all of the gelatin is dissolved.
  5. Remove from heat and beat with an electric hand mixer for a very, very long time (really, it is ~10 minutes, but it seems like forever). The end goal is a foamy mixture that does not settle out, and the pan will likely not be warm to the touch when you reach this point.
  6. Pour into a lined or greased glass dish. I greased my with some coconut oil.
  7. Pop it into the fridge and wait for the magic (gelatin setting) to happen.
  8. Slice into “marshmallow-sized” pieces and store in a ziplock bag in the fridge.
  9. Eat them with your breakfast! Now that you know the many health benefits of gelatin, feel justified in eating marshmallows with breakfast…just make sure you also eat something else.

I captured a few photos during the process…

2013-02-02-15-47-172013-02-02-15-49-532013-02-02-15-51-12

2013-02-09-17-26-20-12013-02-09-19-03-45

References

http://wellnessmama.com/3380/why-ive-been-drinking-green-jello-well-almost/

http://www.naturalhealth365.com/food_news/gelatin.html

Gelatin: A Healthy Protein Powder

http://gold-silver.us/forum/showthread.php?44731-10-Health-Benefits-of-Gelatin